How Should Brands Prepare Artwork Files for Pouch Printing?
A pouch can look flawless on screen and still fail in production when the artwork ignores seam zones, barcode rules, white ink behavior, substrate opacity, or panel orientation. In pouch printing, the file is not just a design asset. It is a production blueprint that must survive preflight, proofing, lamination, sealing, and retail scanning.
The safest approach is to treat artwork preparation as a technical workflow rather than a last-minute export. That means using the converter’s dieline at full scale, building color in CMYK plus clearly labeled spot colors, protecting copy from seals, and confirming orientation before approval. Industry guidance points to the same essentials: predictable PDF handoff, substrate-aware color management, properly prepared white ink, and barcode integrity.1 2 3 4 5
The sections below translate those requirements into practical steps.
Pouch Printing Artwork Prep Checklist: What Should You Confirm Before You Send Files?
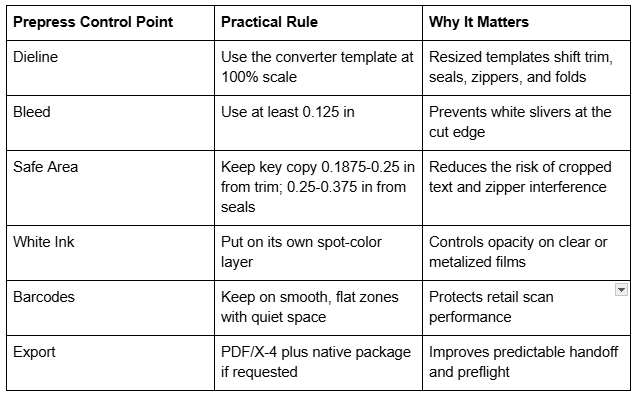
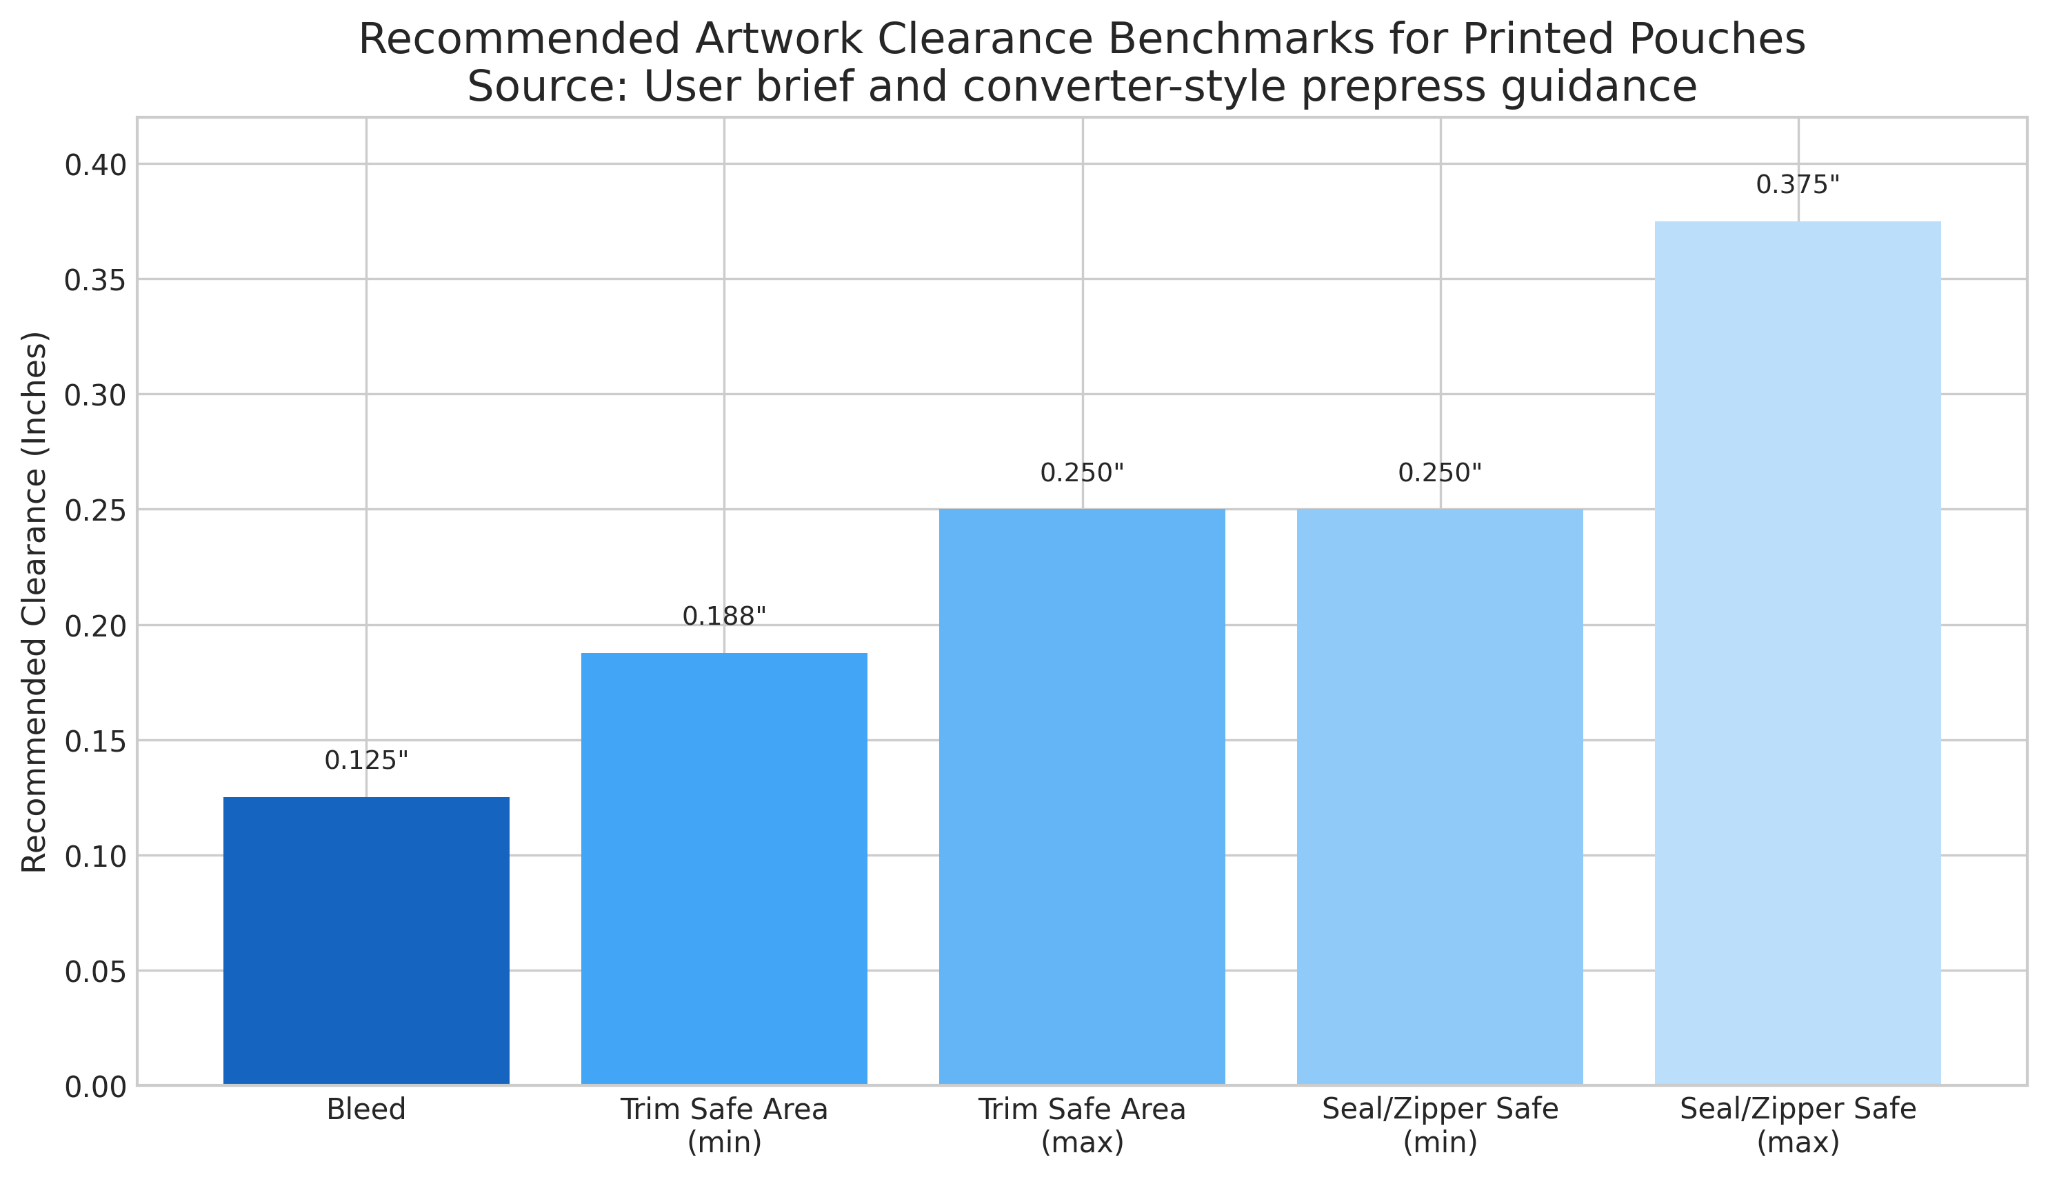
Before the deeper file-by-file walkthrough, use this checklist as a fast quality gate. Request the exact pouch dieline from the converter and place artwork on that template without resizing it. Set the file in CMYK and declare any spot colors clearly. Add at least 0.125 inch bleed, protect safe areas from trim and seal zones, and build a separate White spot layer for clear or metalized films. Keep logos, icons, and small type as vector artwork, and keep raster images at 300 PPI at final size. Outline or embed fonts, label specialty finish layers, verify barcodes with proper quiet zones, confirm front-back-gusset orientation, and export a clean PDF/X-4 unless your print partner requests a different standard.2 4 5
Pouch Printing: What Should Brands Know About Print Methods, File Formats, and White Ink?
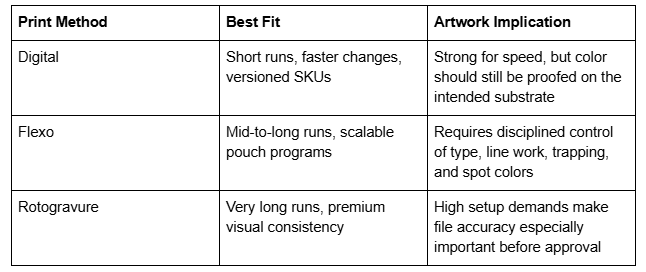
The term pouch printing covers several production methods, and each one changes how conservative your artwork should be. Digital printing is well suited to short runs, versioning, and faster changeovers. Flexography is common for repeatable production across many SKUs, while rotogravure is often chosen for very long runs and premium consistency. Regardless of process, the safest handoff format is usually a press-ready PDF, with PDF/X standards created to support predictable exchange between designer and printer.2 Adobe’s preflight guidance also notes that production files should be checked for colors, fonts, transparency, image resolution, ink coverage, and PDF version compatibility before release.4
Substrate choice matters just as much as the press. The Flexographic Technical Association notes that approved proofs can drift from the printed result if they do not reflect the actual substrate or the presence of printed white ink, adding that white ink can appear darker and less opaque than white film or paper.2 That is why logos, small type, and line art should remain vector; raster images should remain at effective final-size resolution; and brand colors should be reviewed in context, not only on a bright monitor.
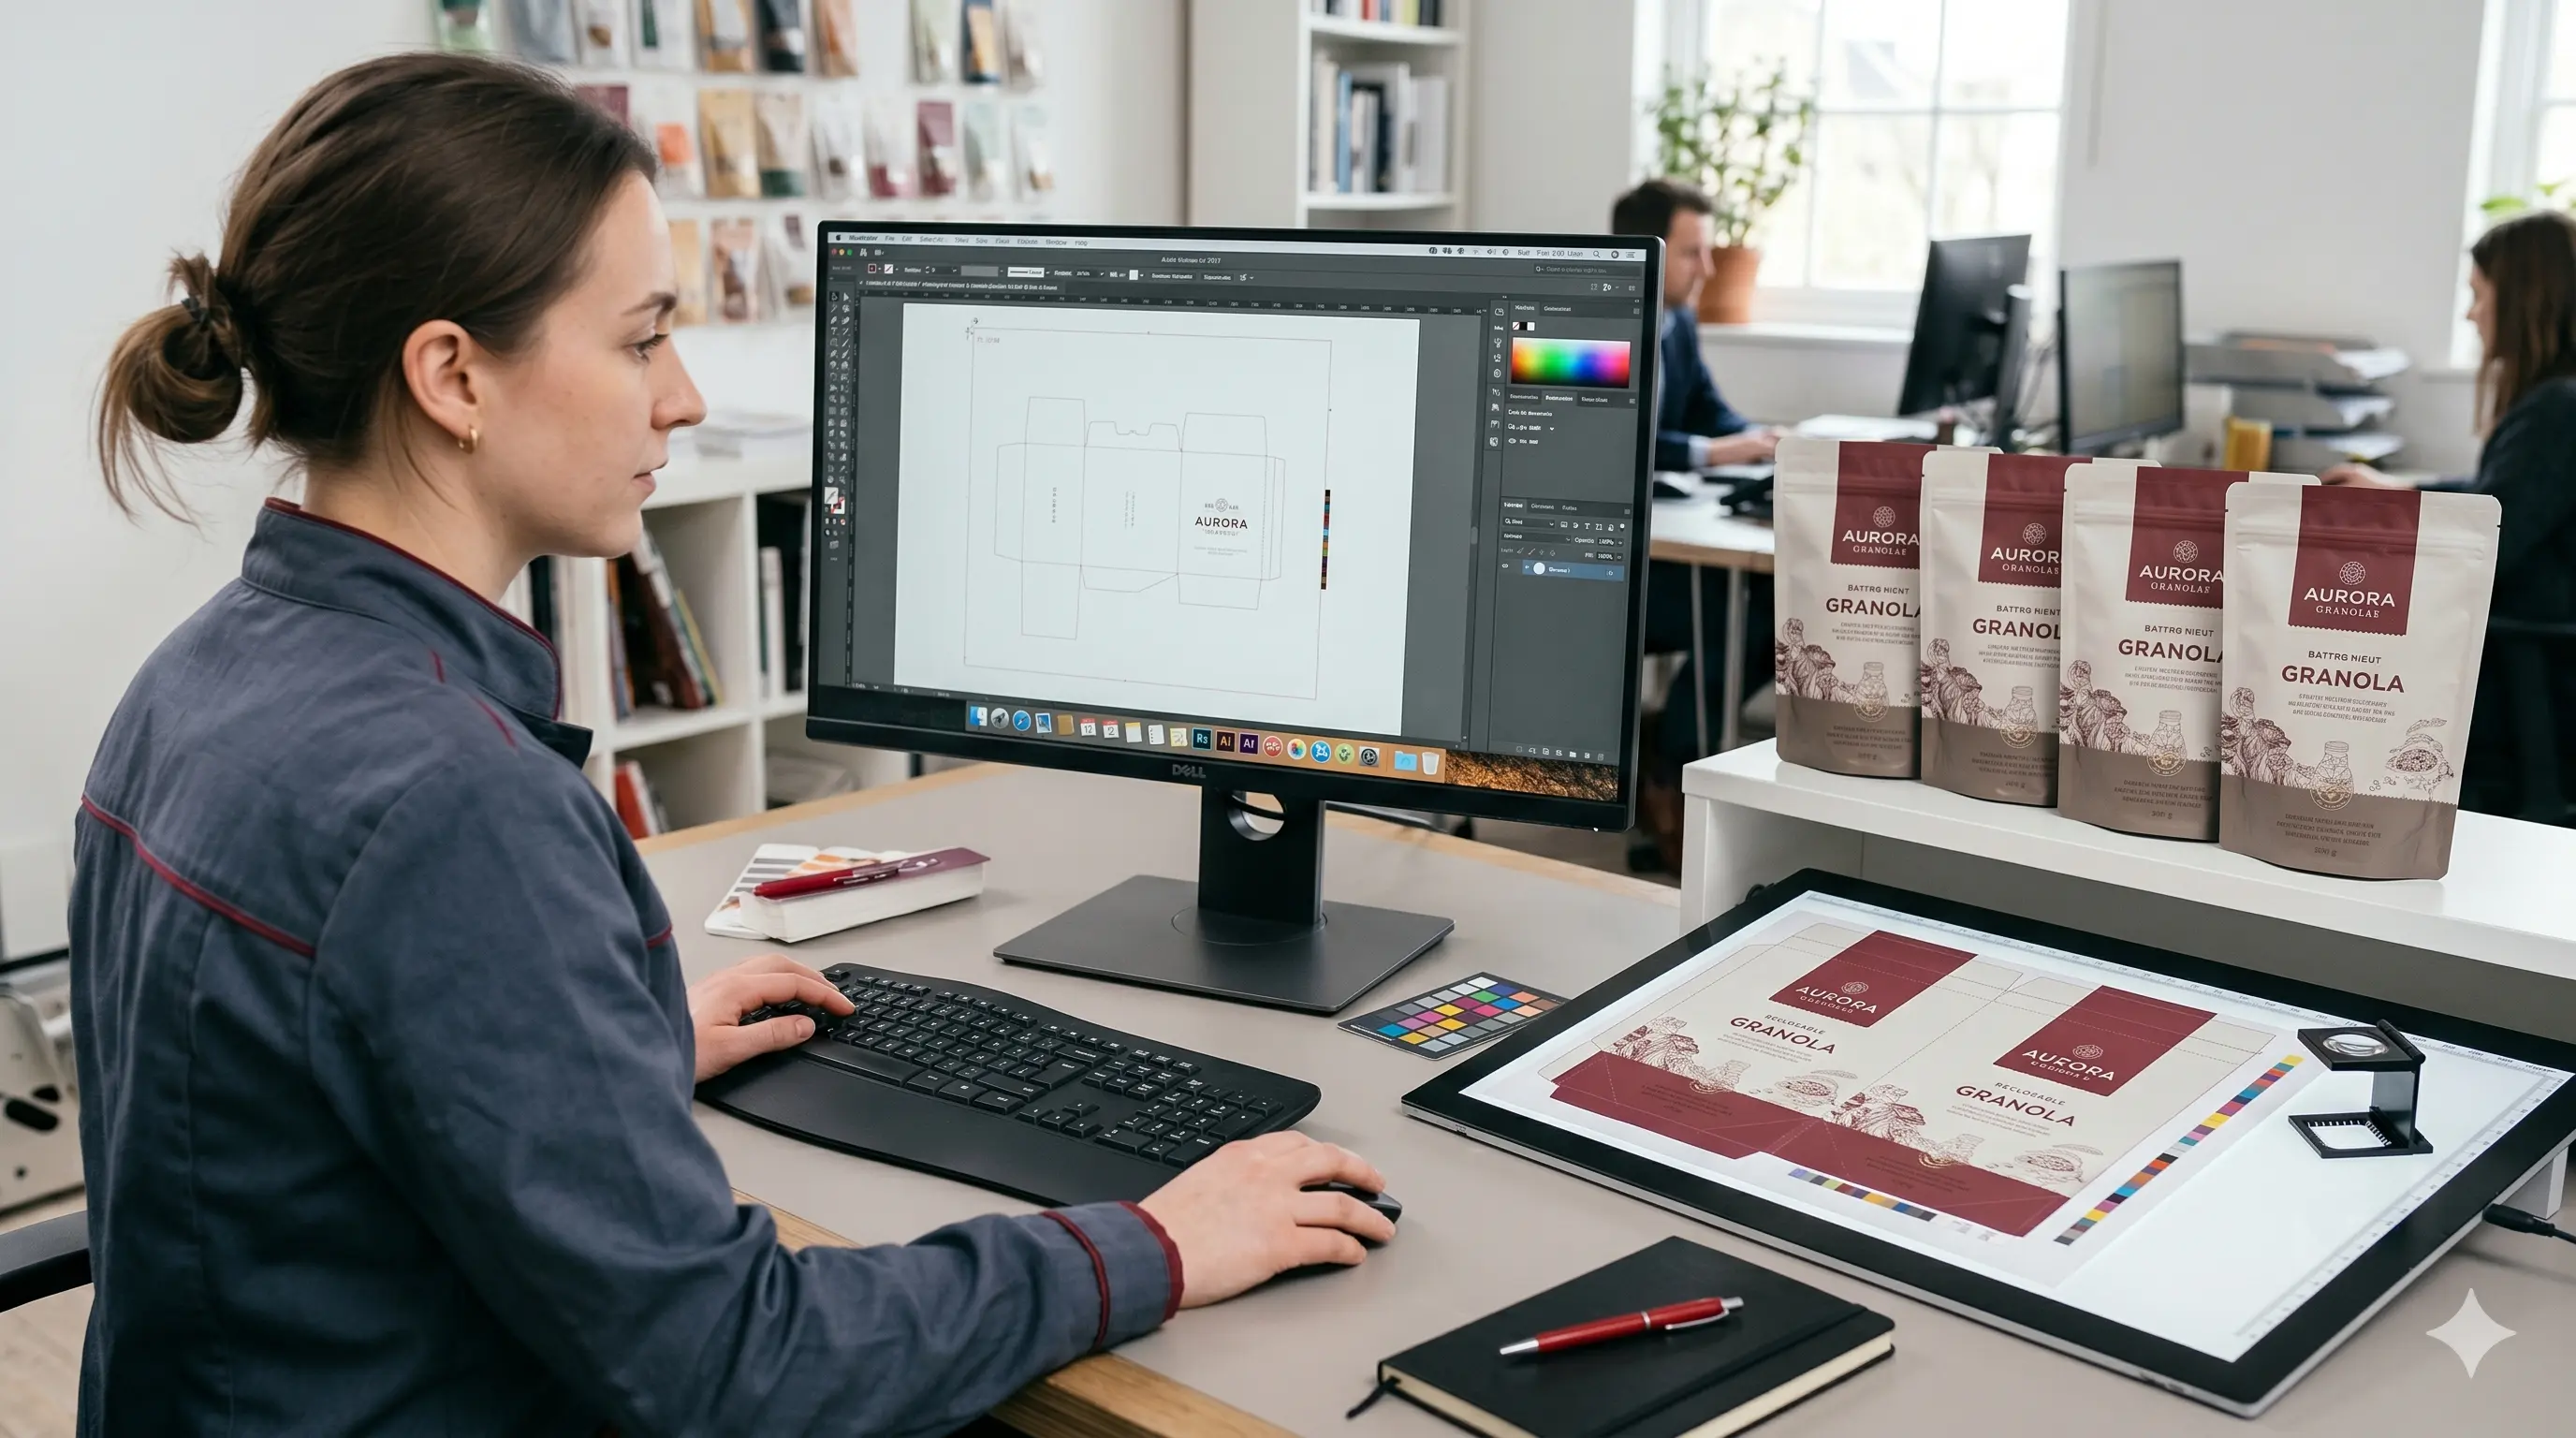
Custom Printed Pouches: How Should You Use Dielines, Bleeds, and Safe Areas Correctly?
With custom printed pouches, the converter’s dieline is the master document. Never redraw it from memory and never scale it to “fit better.” Keep the dieline on its own non-printing layer, and keep cut lines, score lines, zipper positions, hang holes, spouts, and heat-seal zones separate from printable art. The FTA design guide likewise recommends isolating die information on its own layer or unique spot color.2
Think in zones: bleed protects the outside edge, trim-safe area protects readable content, and seal-safe area protects the package hardware. If a logo sits too close to a zipper or side seal, the problem is not cosmetic. It is functional.
Stand Up Pouch Printing: How Should You Handle Gusset Folds, Front-Back Wraps, and Orientation?
In stand up pouch printing, the bottom gusset changes how artwork behaves. A front panel that looks centered in flat view can distort once the pouch is formed and filled. Hero elements should stay on the front panel, while graphics that continue across the gusset should be checked with a printed mockup or 3D render. Critical copy should stay at least 0.25 inch from gusset folds and seals.
Orientation mistakes are also expensive. If the back panel is mirrored incorrectly or the gusset art is upside down, the job may print but still be unusable. A scaled paper mockup is one of the fastest ways to catch that risk.
Printed Stand Up Pouches: How Do You Set Up Windows, Metallic Effects, and Coating Layers?
When working on printed stand up pouches, selective opacity drives the result. A clear window only works if the no-print area and the white separation are defined intentionally. Metallic effects, matte-gloss contrasts, tactile varnish, and foil indicators also need their own labeled layers.
FTA guidance recommends naming white ink explicitly as a custom color and distinguishing it from areas that are intentionally left unprinted.2 That distinction is critical on windowed pouches because “white” and “clear” are not the same instruction.
Custom Printed Pouch Bags: What Compliance Copy, Barcode Rules, and Minimum Type Sizes Should You Follow?
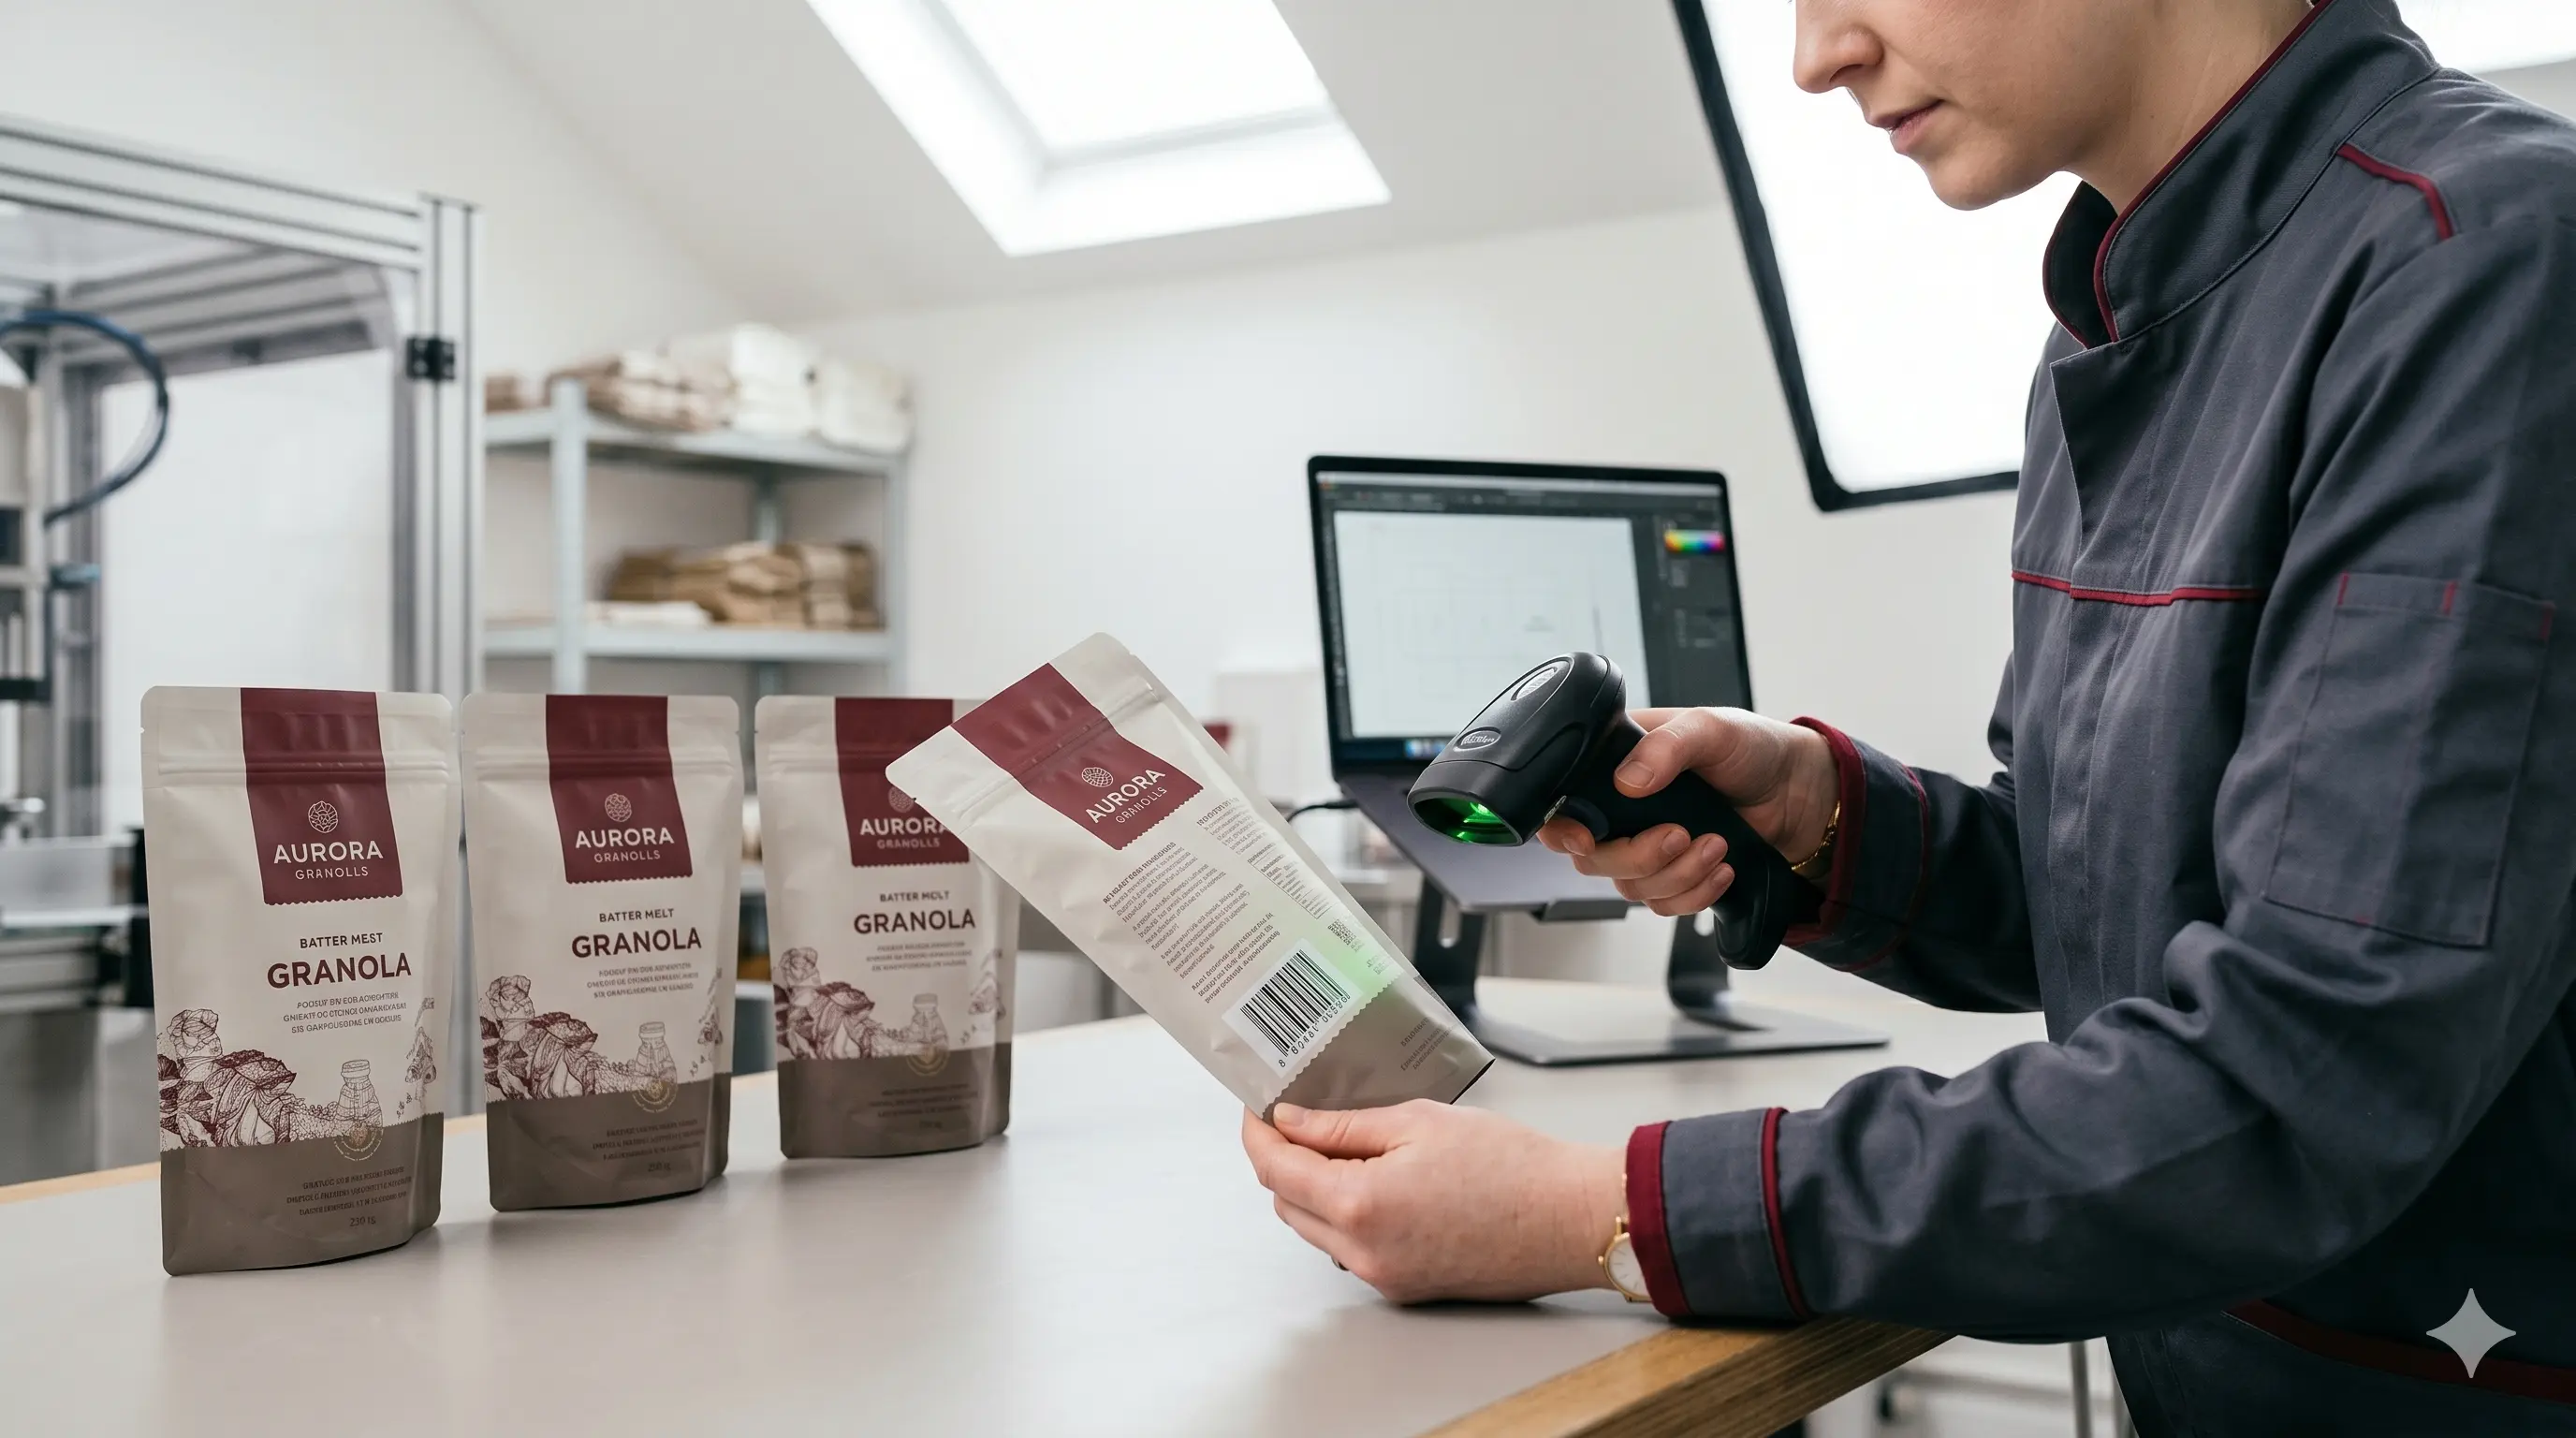
For custom printed pouch bags, beautiful branding is only half the job. Food, supplement, personal care, and retail packs also need room for compliant copy, lot/date coding, net contents, ingredients, and barcodes. GS1 US warns that poor barcode quality can lead to manual keying, lost sales, and retailer charge-backs, which is why barcode art should be created at the final required size rather than shrunk or stretched later.5
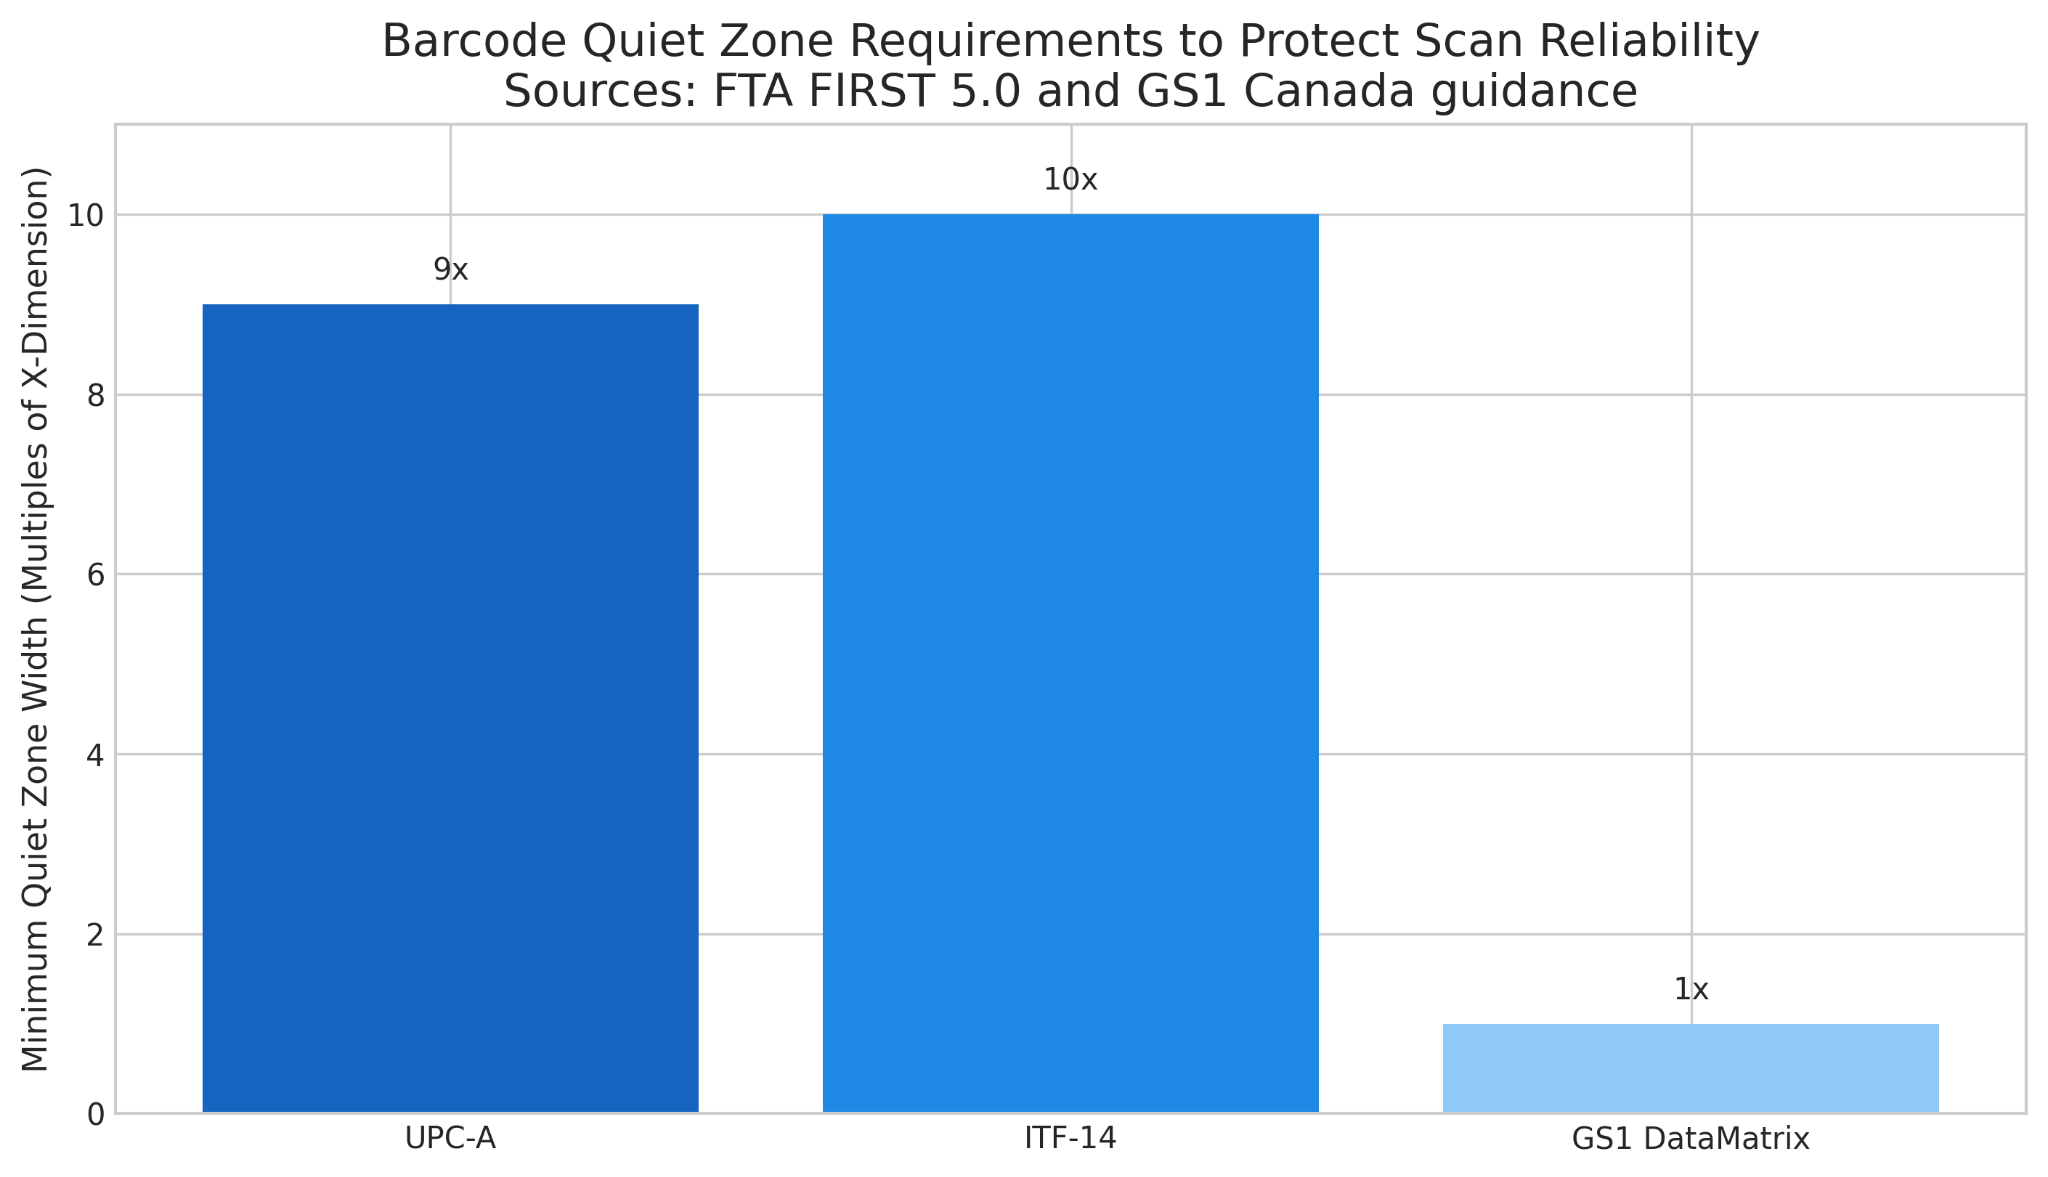
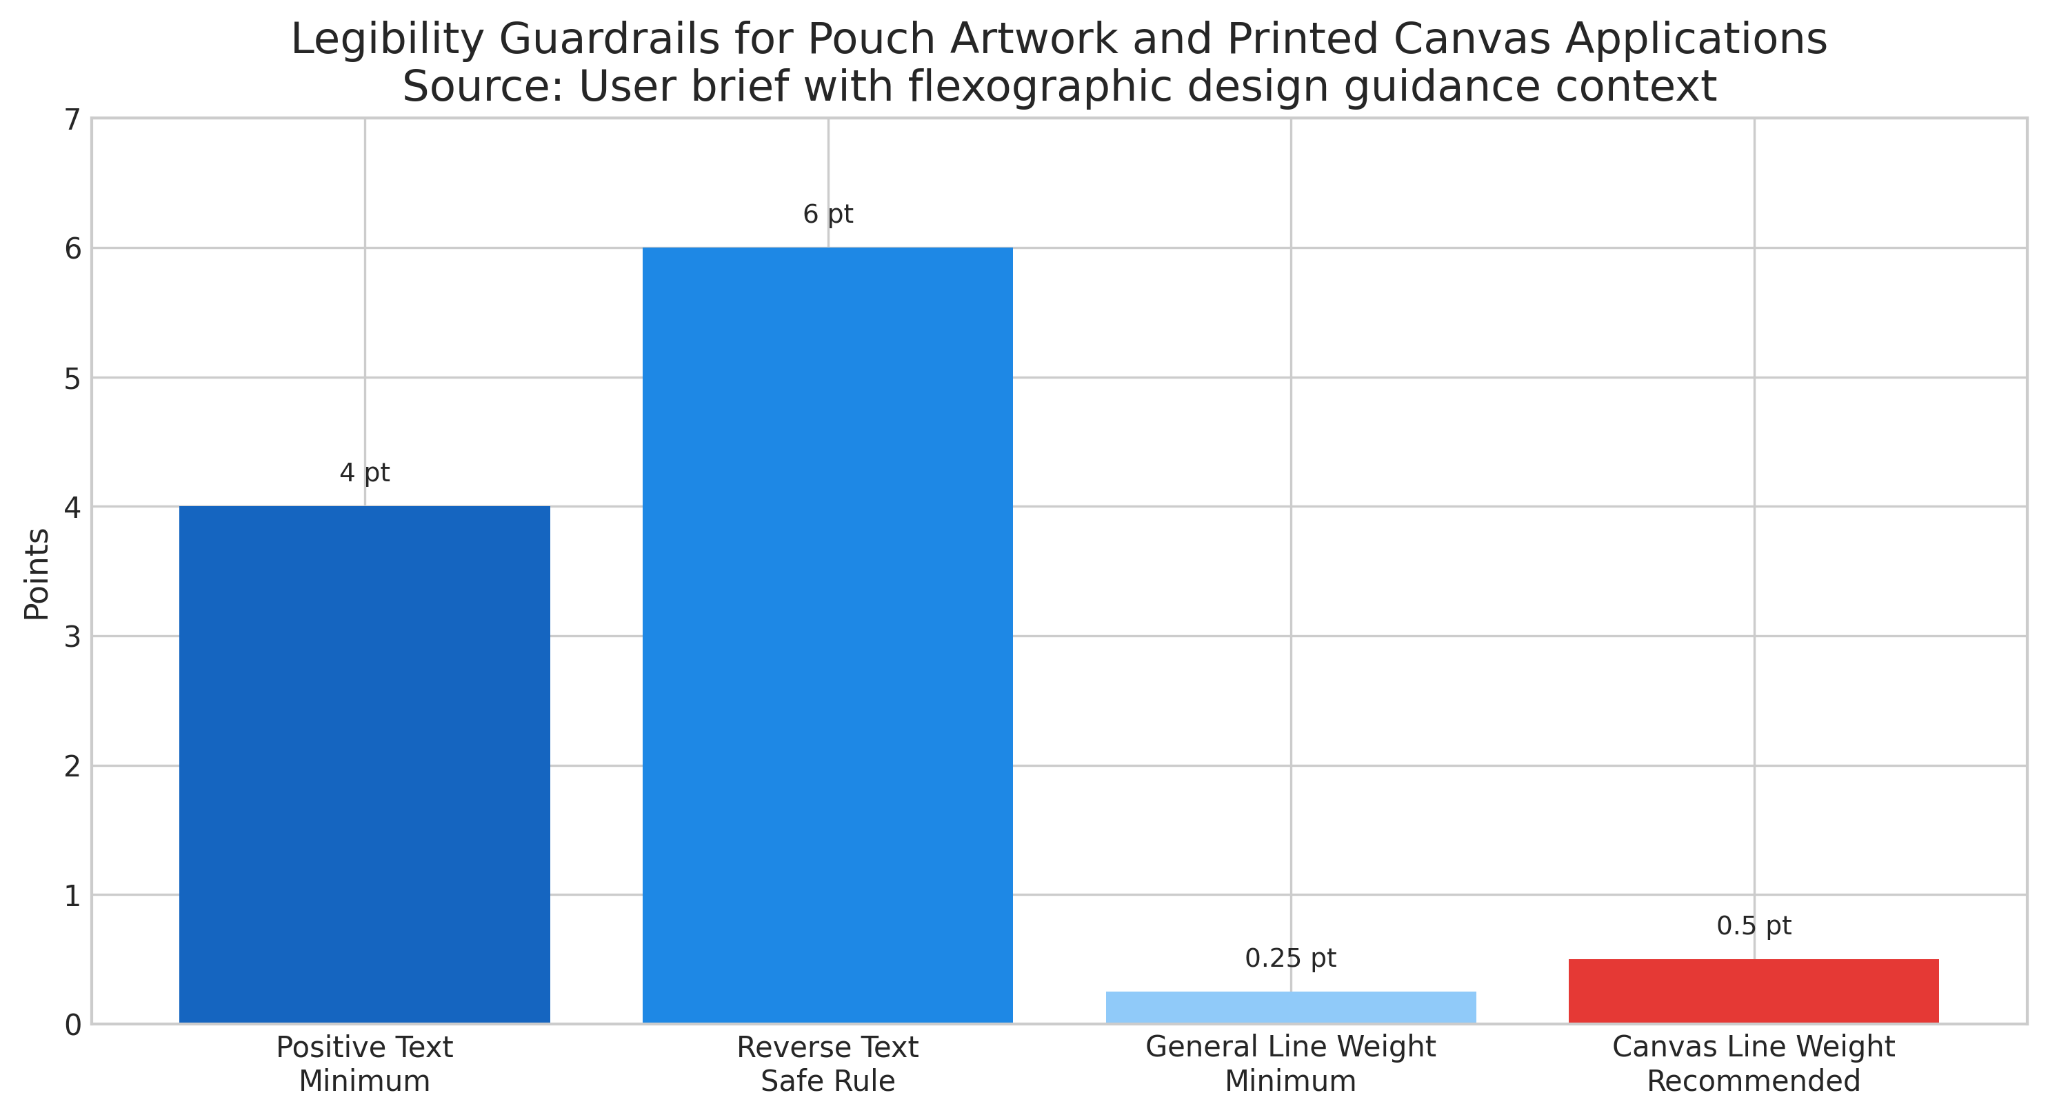
Flexible packaging guidance also reinforces that barcode quiet zones must remain free of graphics, die lines, closures, perforations, scores, and cutouts.6 The FTA guide adds that a UPC-A symbol requires quiet zones of 9 times the X-dimension on each side, while ITF-14 requires 10 times the X-dimension.2 For on-pack human-readable information associated with barcodes, the same guide specifies a sans serif font at a minimum 10 to 12 point type size.2 In the wider package design, the brief’s conservative safe rule of 4 pt minimum for positive text and 6 pt minimum for reverse text is a practical threshold for preserving legibility.
Printed Canvas Pouch: What Design Changes Help Coarse Substrates Reproduce Better?
A printed canvas pouch behaves differently from a smooth laminated film pouch because the substrate texture can swallow fine detail, soften halftones, and weaken thin lines. That is why the brief recommends 0.5 pt or thicker line weights, bolder fonts, and simpler graphics for canvas applications. The principle aligns with flexographic design guidance that minimum type size and rule width are print-system dependent and should be confirmed with the printer, especially as detail gets smaller.2
If a brand must reproduce intricate logos or delicate serifs on canvas, the most responsible workflow is to request test swatches or a physical proof. Screen-perfect artwork can break down quickly once absorbency, weave, and ink spread enter the equation.
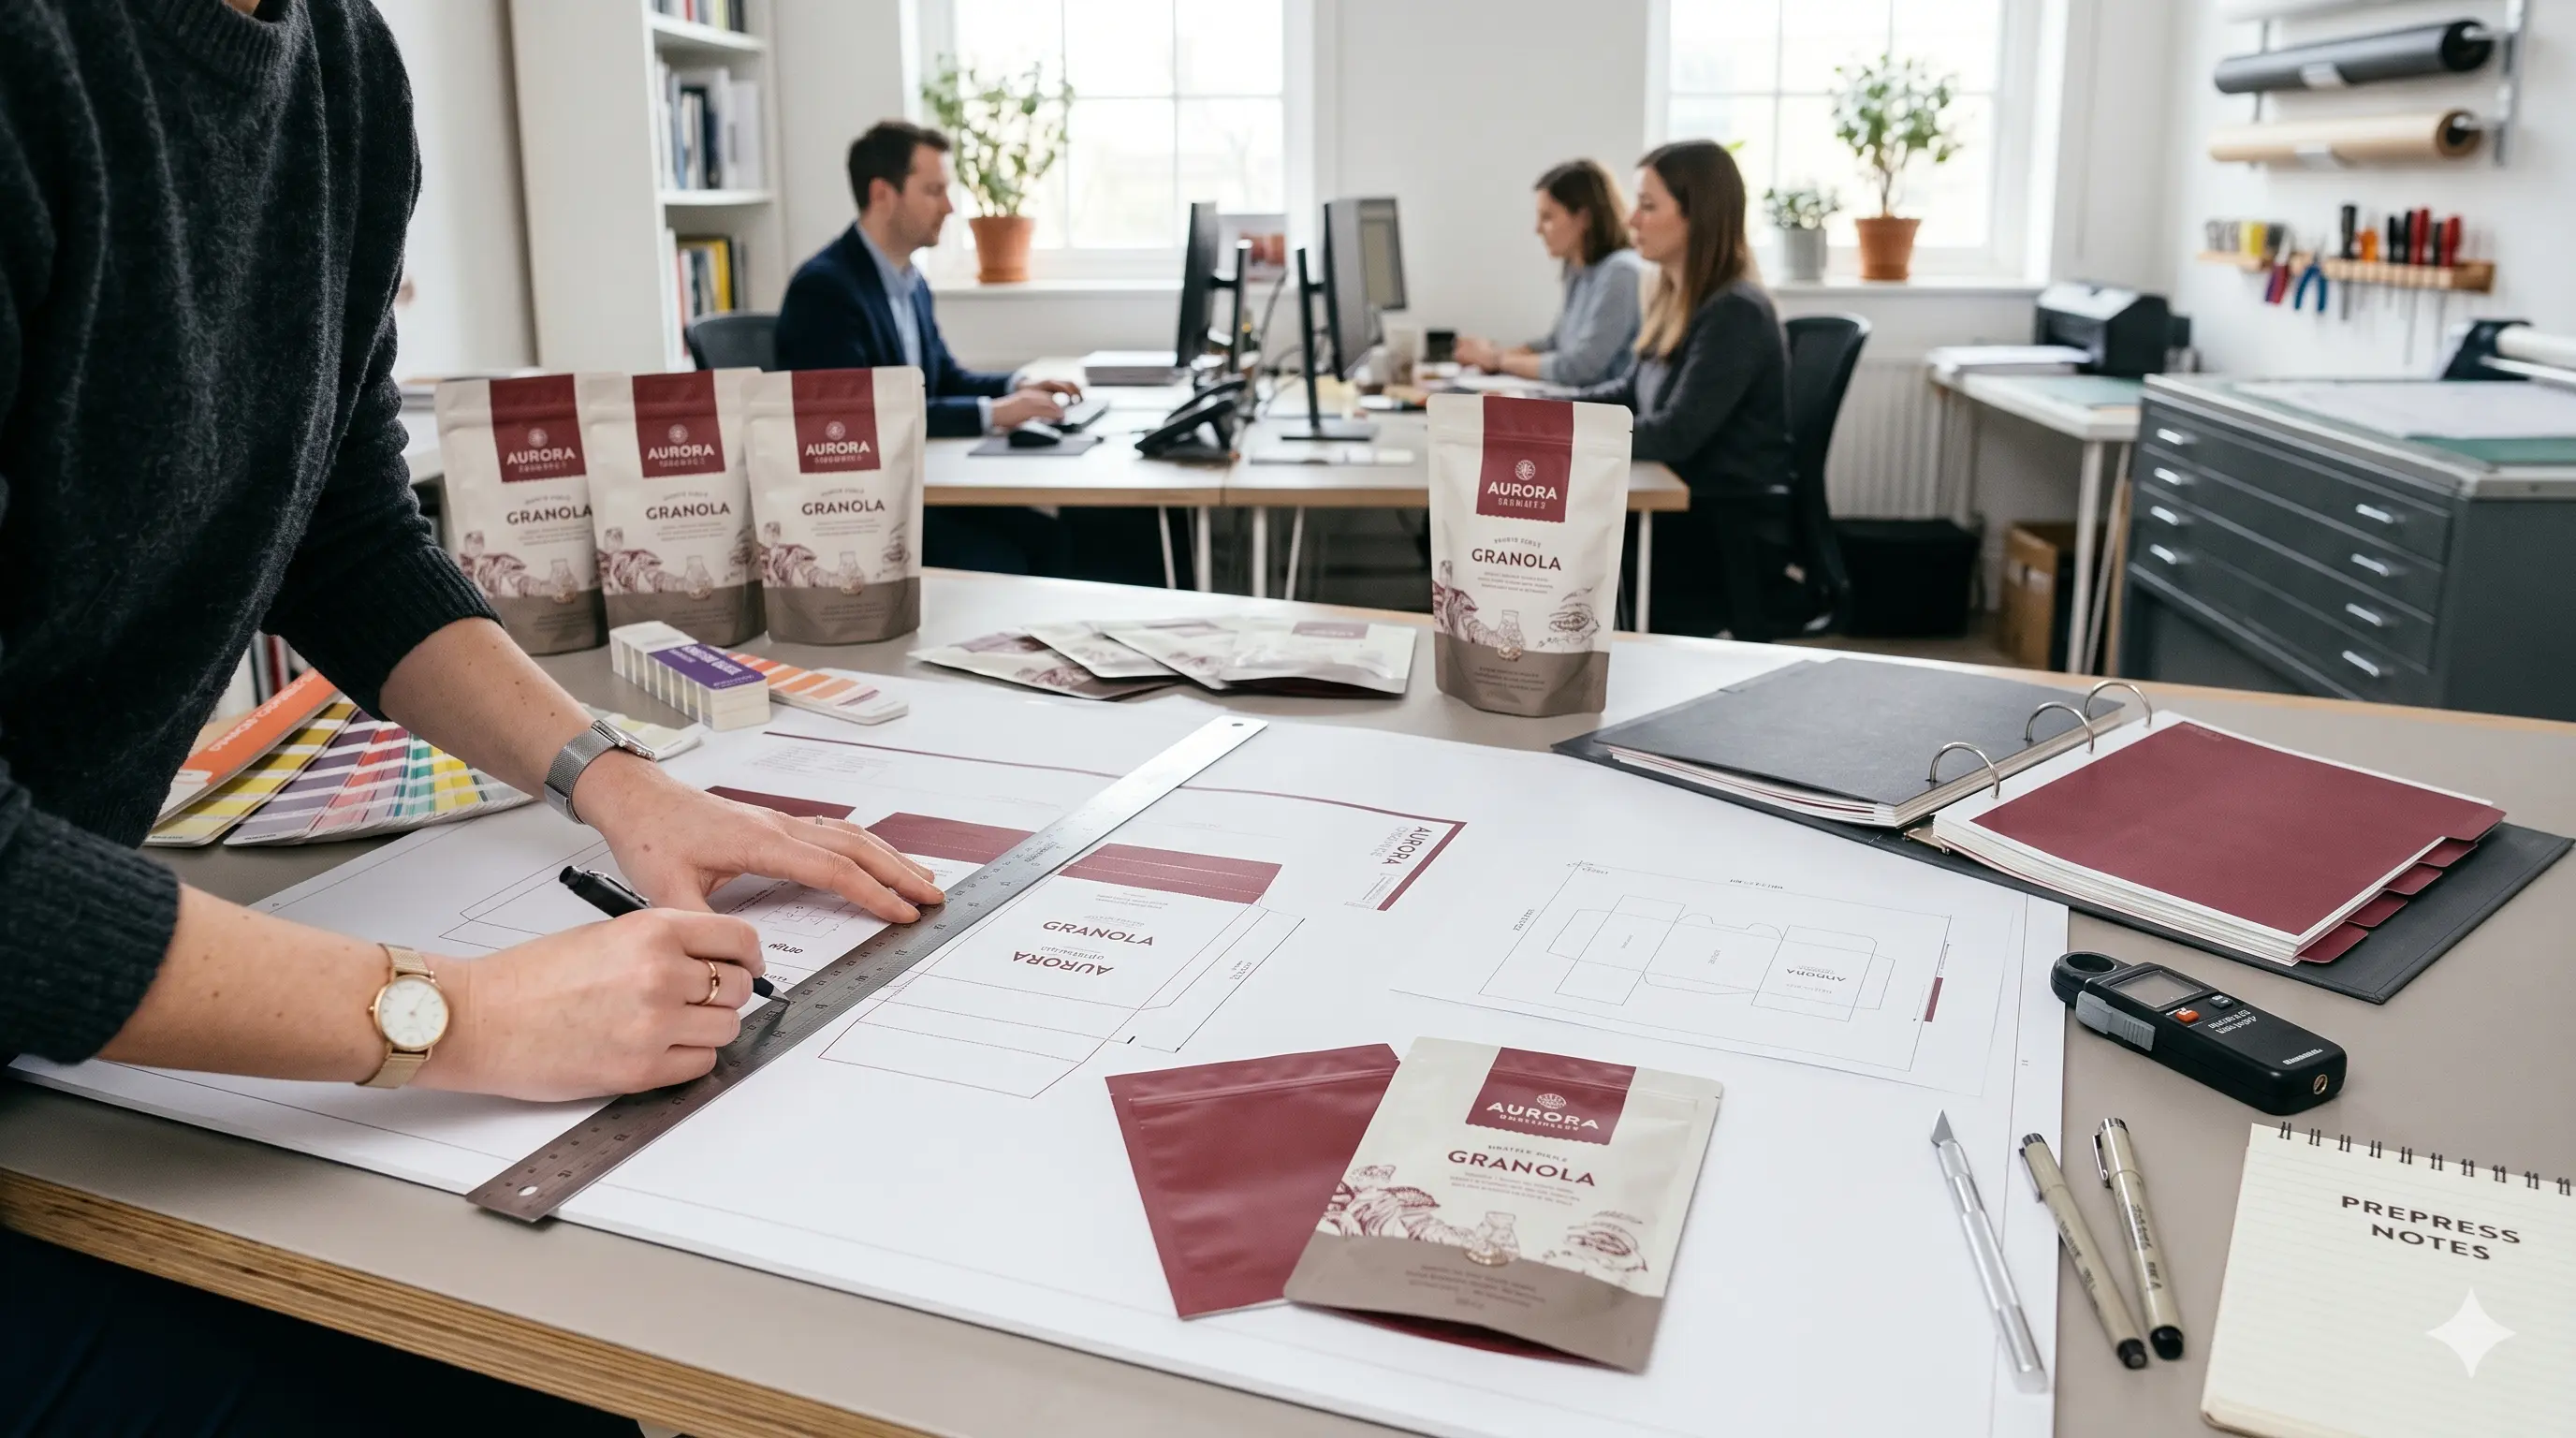
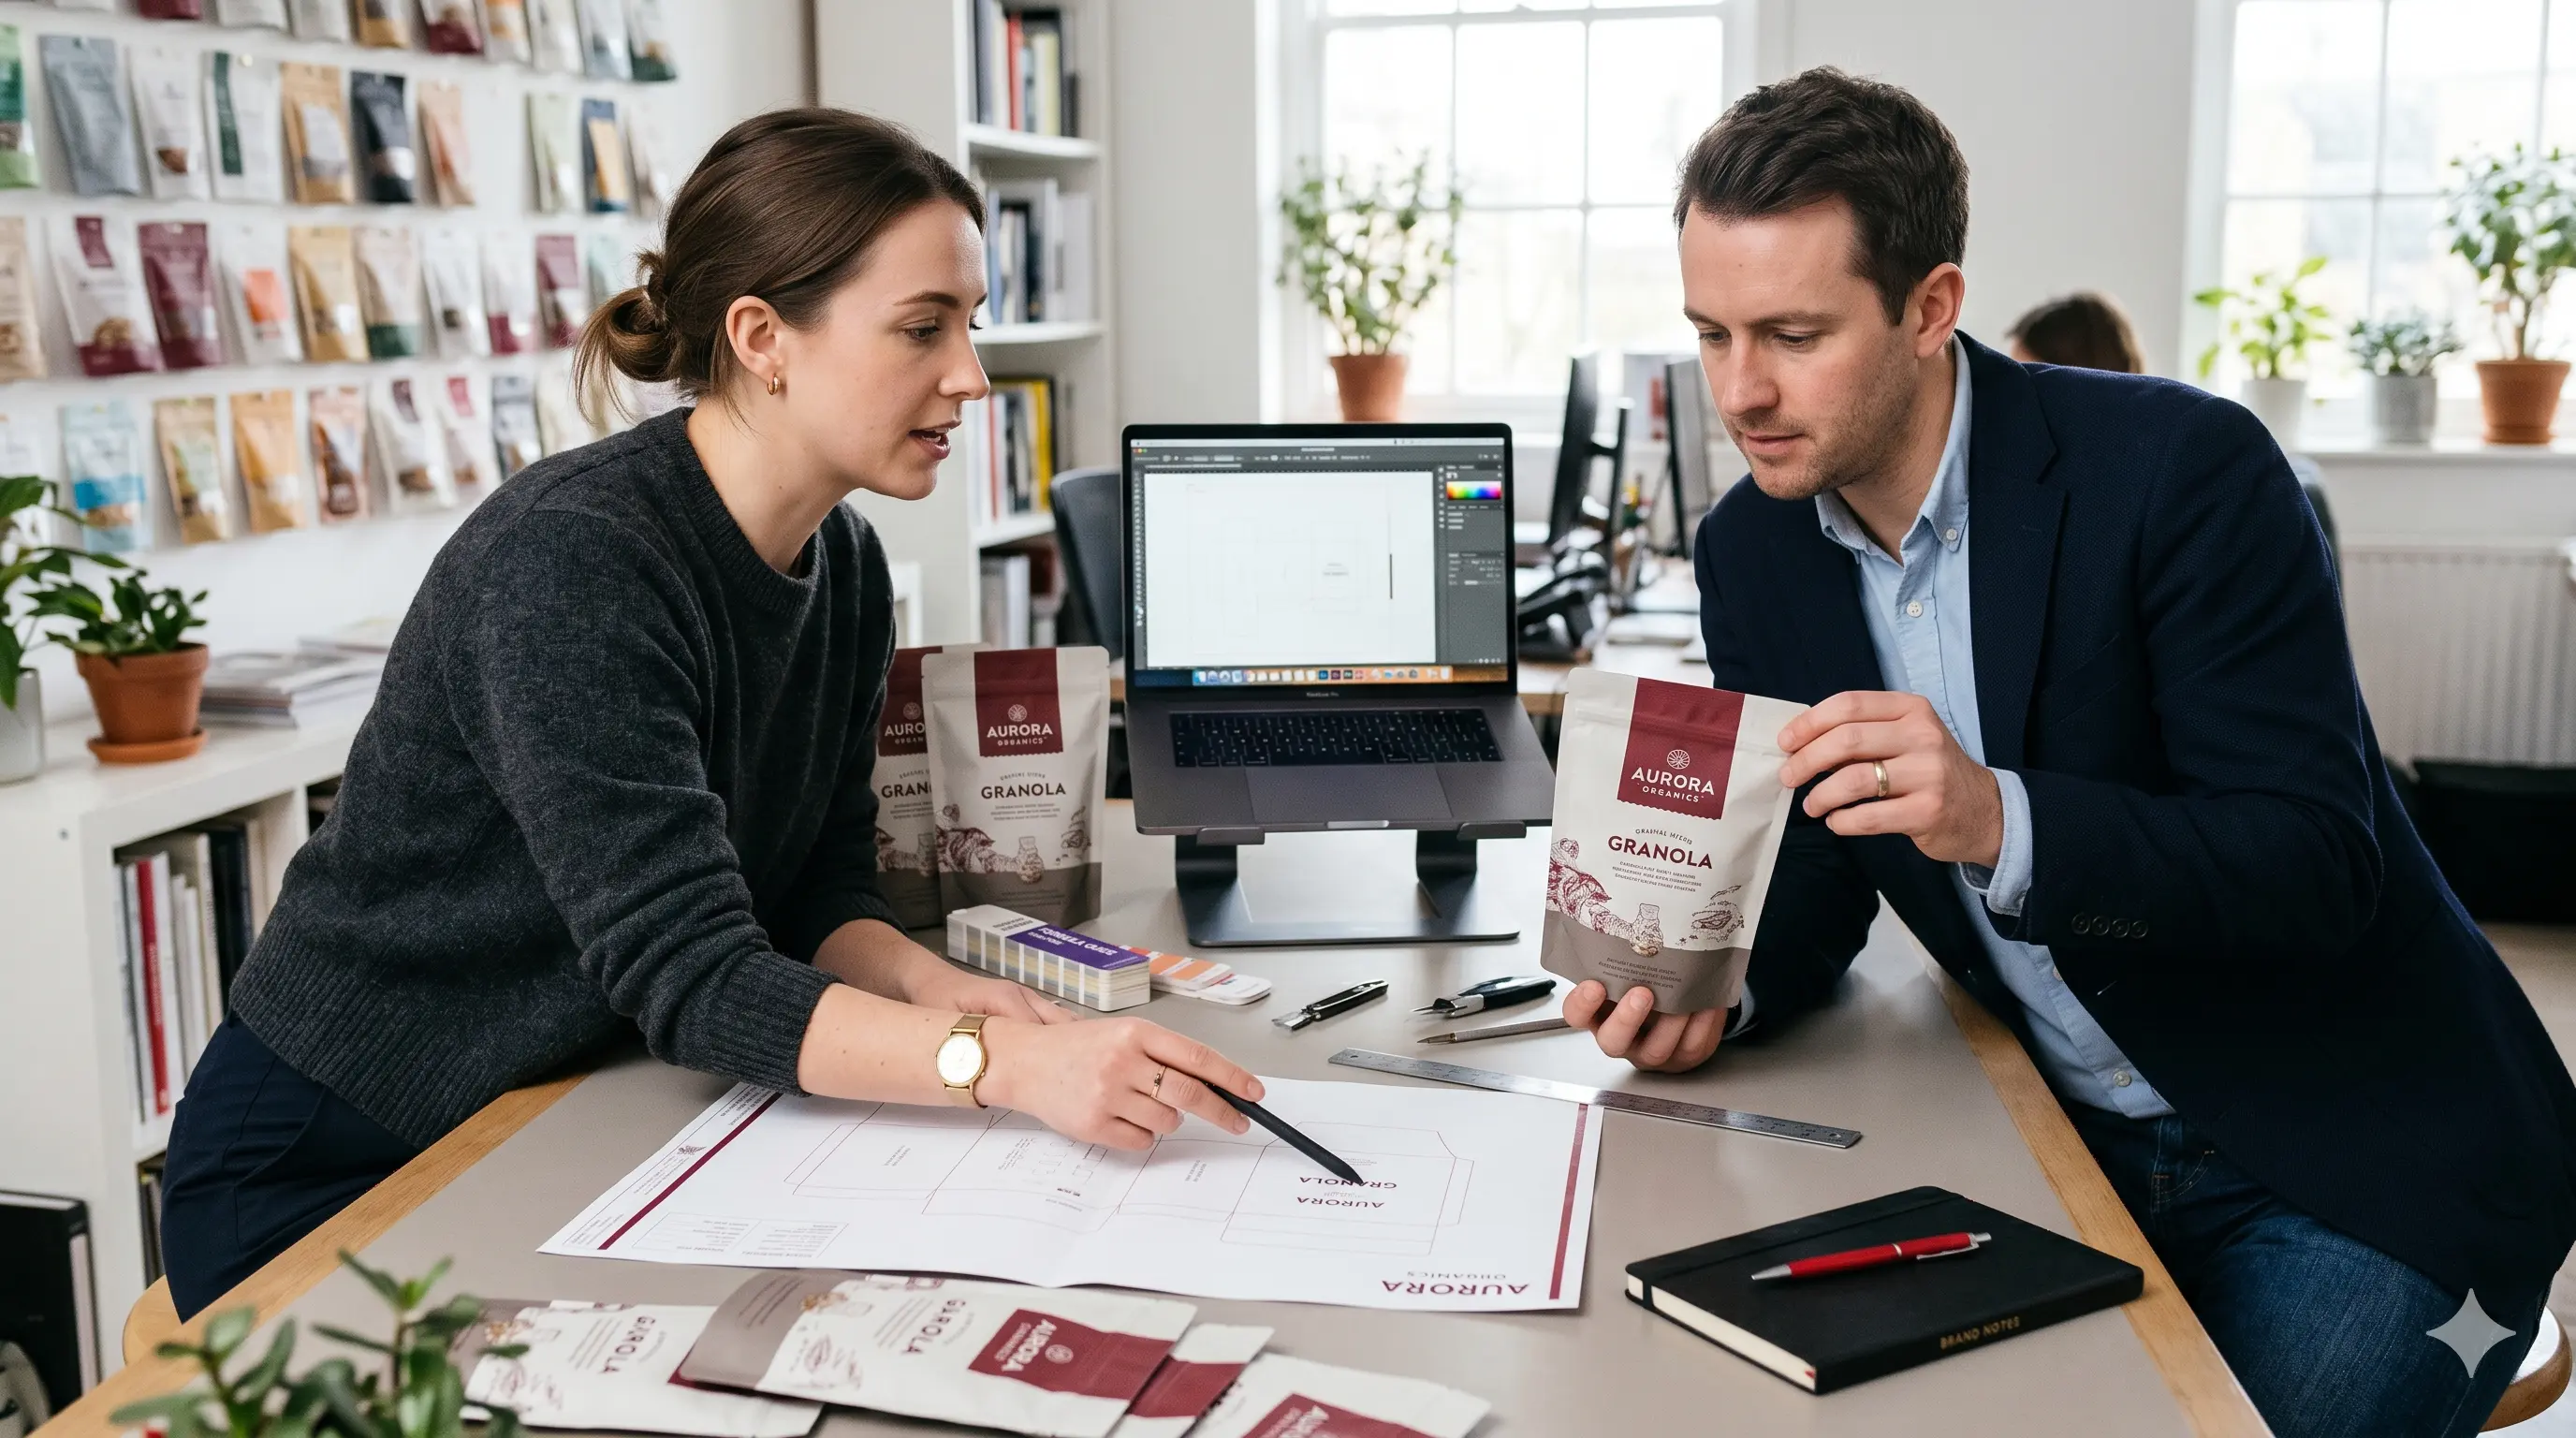
Custom Print Stand Up Pouches: How Should You Manage CMYK Builds, Spot Colors, and Proofing?
For custom print stand up pouches, color control starts long before export. Miller Graphics notes that packaging prepress teams rely on ICC profiles and calibrated devices to improve fidelity when RGB designs are converted into CMYK print output.3
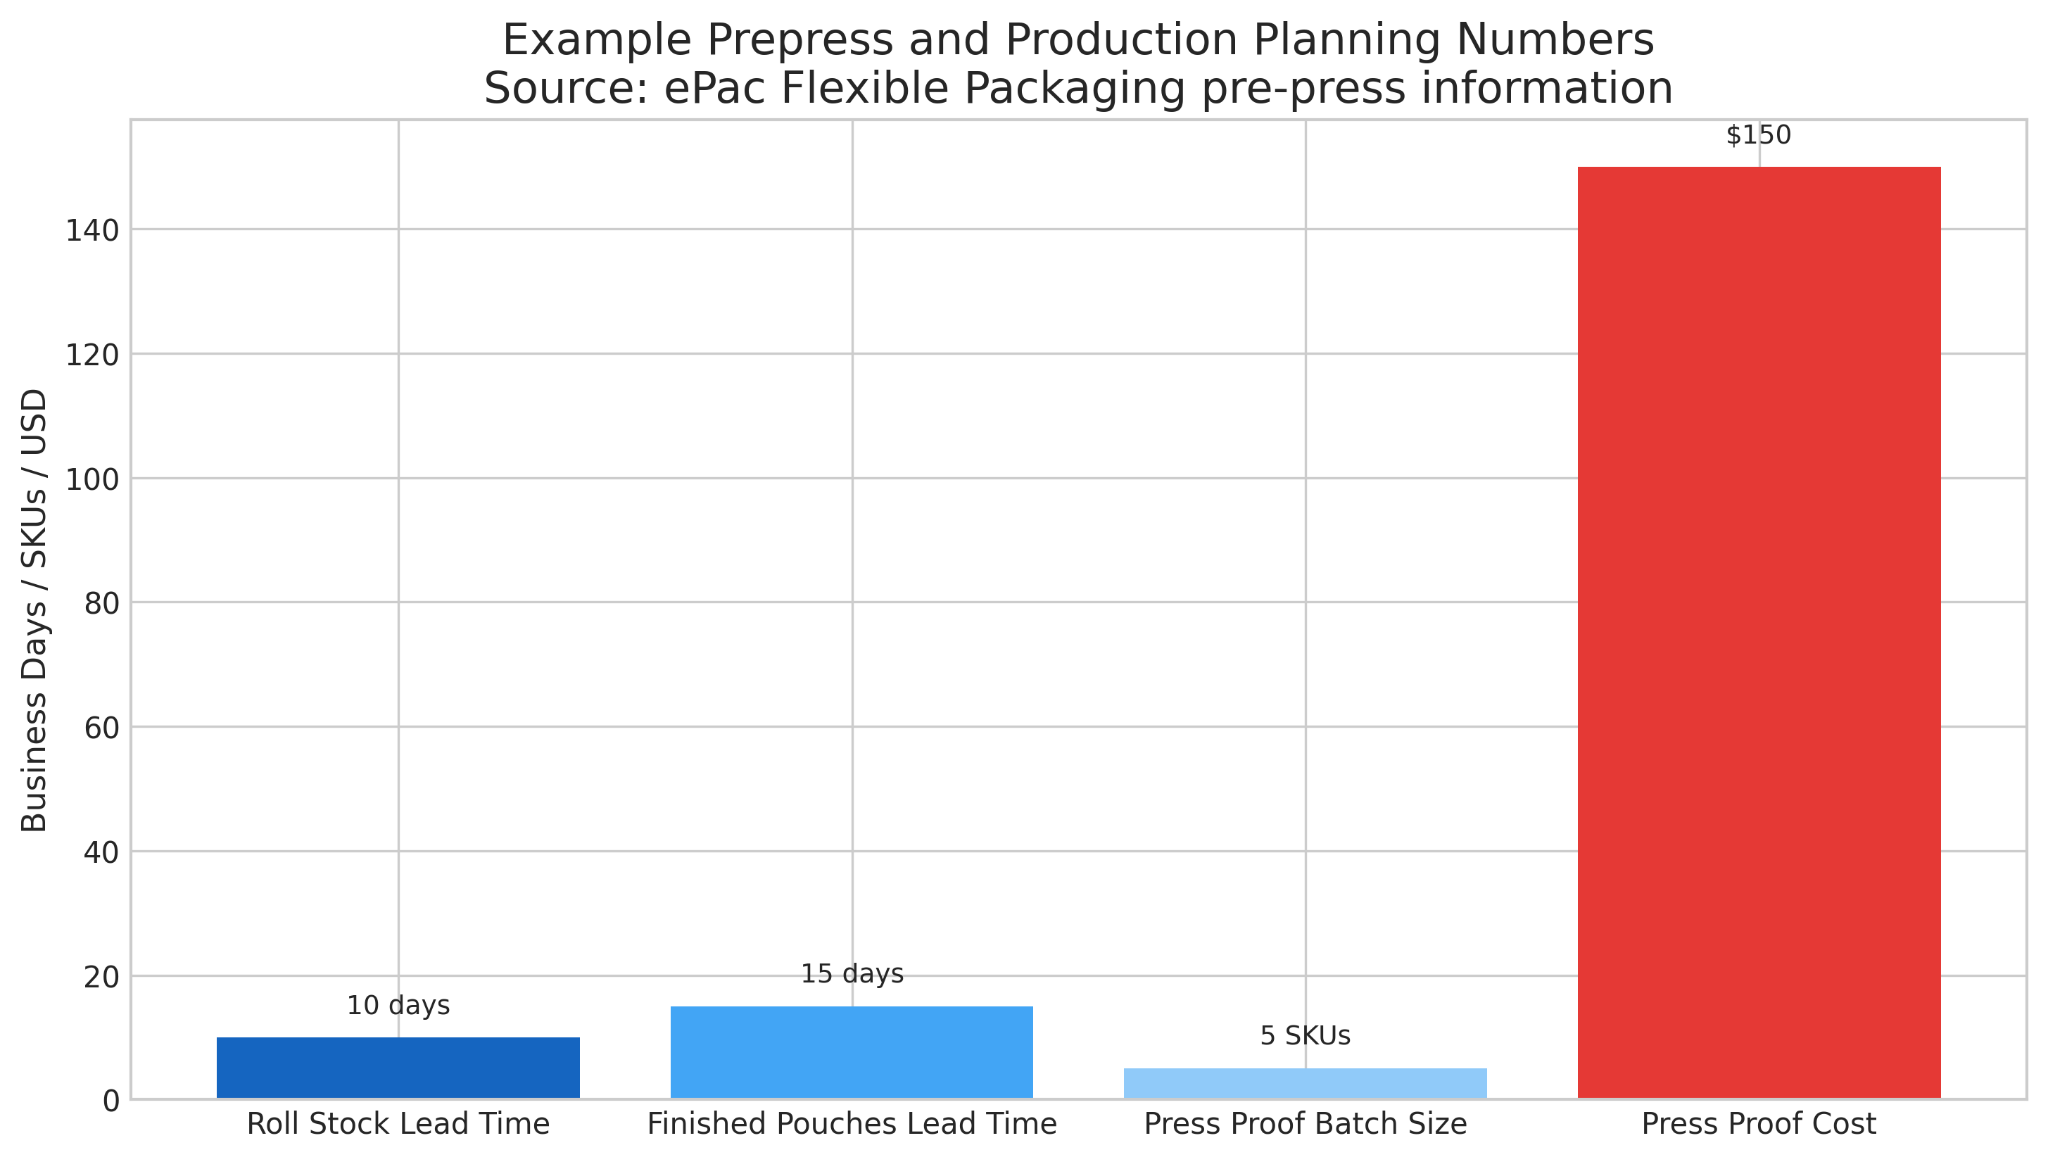
Soft proofs are useful for checking content and panel order, but they are not exact predictors of final press color.3 If the pouch is color-critical, especially on metalized or clear films, a wet proof or press proof on the planned substrate is the stronger decision. ePac also notes that non-laminated press proofs are available on request.1
Custom Printed Flat Pouches: What File Prep Changes When There Is No Gusset?
With custom printed flat pouches, you remove the bottom gusset but not the risk. Seal zones can feel tighter, and front-back alignment becomes more noticeable when the package lies flat. If the template requires mirrored back art or specific valve or hang-hole spacing, follow it exactly.
Flat pouch programs also benefit from master styles, color swatches, and reusable symbols across sizes. That consistency reduces prepress cleanup and makes future extensions easier.
Custom Printed Stand Up Pouch: What Finishing Features Change Your Layer Setup and Clearance Notes?
A custom printed stand up pouch may include zippers, laser scoring, perforations, hang holes, spouts, tear notches, matte-gloss contrasts, or foil indicators. Every extra feature adds a new clearance decision, so non-printing guides should live on their own layer and special placements should be called out in writing.
A prepress operator should not have to guess whether a shape is decorative, structural, or instructional. Clear file architecture reduces avoidable clarification.
Printed Pouch: What Should Your Final Export and Preflight Routine Include?
Before you release any printed pouch file, run a final preflight routine. Adobe states that preflight can detect problems with colors, fonts, transparency, image resolution, ink coverage, and PDF compatibility, and also emphasizes embedding fonts from the authoring application to prevent substitution.4 That makes preflight one of the last high-value checks before the file leaves your team.
The practical export routine is simple. Remove hidden clutter, confirm that the dieline is non-printing, verify overprint settings intentionally, check orientation, confirm barcode placement, and export PDF/X-4 with marks off unless the converter asks for them. If the vendor requests native files, include the packaged links and fonts as well.
Printed Pouches: What Prepress Mistakes Cause the Most Delays and Reprints?
Most printed pouches run into trouble for a small set of repeated reasons: the dieline was scaled, RGB images slipped into a CMYK workflow, white ink was missing, text drifted too close to seals, barcode quiet zones were compromised, or transparency stayed unresolved until rip time. ePac, Adobe, and GS1 all point to the same conclusion: predictable output comes from disciplined file setup, not last-minute fixes.1 4 5
The safest quality gate combines automated and physical checks. Run a preflight profile, use overprint preview, print a scaled mockup, and request the proof level that matches the risk.
How Can Brands Get Pouch Printing Artwork Right the First Time?
The fastest way to reduce pouch printing errors is to respect production realities early. Accurate dielines, controlled layers, CMYK-plus-spot workflows, protected barcode zones, substrate-aware proofing, and disciplined export standards all reduce ambiguity before the file reaches press.
Strong pouch printing outcomes come from a repeatable system. Request the dieline early, build the file cleanly, verify orientation in physical form, and involve prepress before the deadline becomes urgent.
Pouch Printing Preflight Guide

Frequently Asked Questions: How Should Brands Prepare Artwork Files for Pouch Printing
What Is Pouch Printing And How Does It Work?
Pouch printing is the process of applying graphics and product information to flexible packaging films or specialty substrates such as paper laminates or canvas-style materials. The file is then output through digital, flexographic, or rotogravure production, converted, laminated if required, and formed into finished pouches.2 3
What File Format Is Best For Pouch Printing?
A press-ready PDF is typically the safest handoff format, and PDF/X standards are specifically designed to support predictable exchange between creator and printer.2 Many converters also ask for the native packaged file so prepress can inspect links, fonts, and layer construction.
How Much Bleed Do I Need For Stand Up Pouch Printing?
A practical baseline is 0.125 inch bleed, unless the converter’s dieline specifies something different. The key is not only the bleed itself, but also maintaining safe distance from trim, folds, seals, and zipper hardware.
How Do I Set Up A White Ink Layer For Clear Or Metalized Pouches?
Create white as a dedicated spot color on its own layer and distinguish it clearly from areas meant to stay unprinted. The FTA guide specifically recommends naming that custom color white ink and separating it from areas labeled unprinted or clear.2
Should I Use CMYK Or Spot Colors For Custom Printed Pouches?
Most pouch files are built in CMYK, but spot colors are still valuable for brand-critical hues, white ink, and special finishes. ePac’s prepress guidance states that artwork should be supplied in CMYK while Pantone colors should remain as spot colors where specified.1
How Do I Prepare Barcodes For Printed Stand Up Pouches?
Build the barcode at final size, keep it on a smooth and non-distorted area, preserve quiet zones, and avoid placing it near seals or edges. GS1 also recommends dark bars on a light background and warns against using red bars because scanners use red light.5
Can I Print A Window On A Stand-Up Pouch?
Yes, but only if the file clearly separates printed areas, white ink, and intentionally transparent zones. A window is a production instruction, not just a visual effect, so the layers must tell prepress exactly what should remain clear.
Do I Need A Press Proof For Printed Pouches?
Not for every job, but a press proof is a strong choice when color accuracy is critical, the substrate is unusual, or the pouch includes white ink, metallic effects, or complex panel transitions. Miller Graphics notes that wet proofs, made on the planned substrate with the actual inks, are the closest check to the final result.3